Portal
WinOcular Portal
Copyright 2000
by Combined Computer Resources, Inc. 2777 Stemmons Frwy., Suite 1046
Dallas, Texas 75207 Telephone 214/267-1
010 Fax 214/267-1019
Support Line 800/956-1866
www.winocular.com
Combined Computer Resources, Inc.
Combined Computer Resources, Inc.
Page 1
Portal
Portal Login
1.
You may login to the WinOcular Portal by
entering your User ID and password at the login
screen.
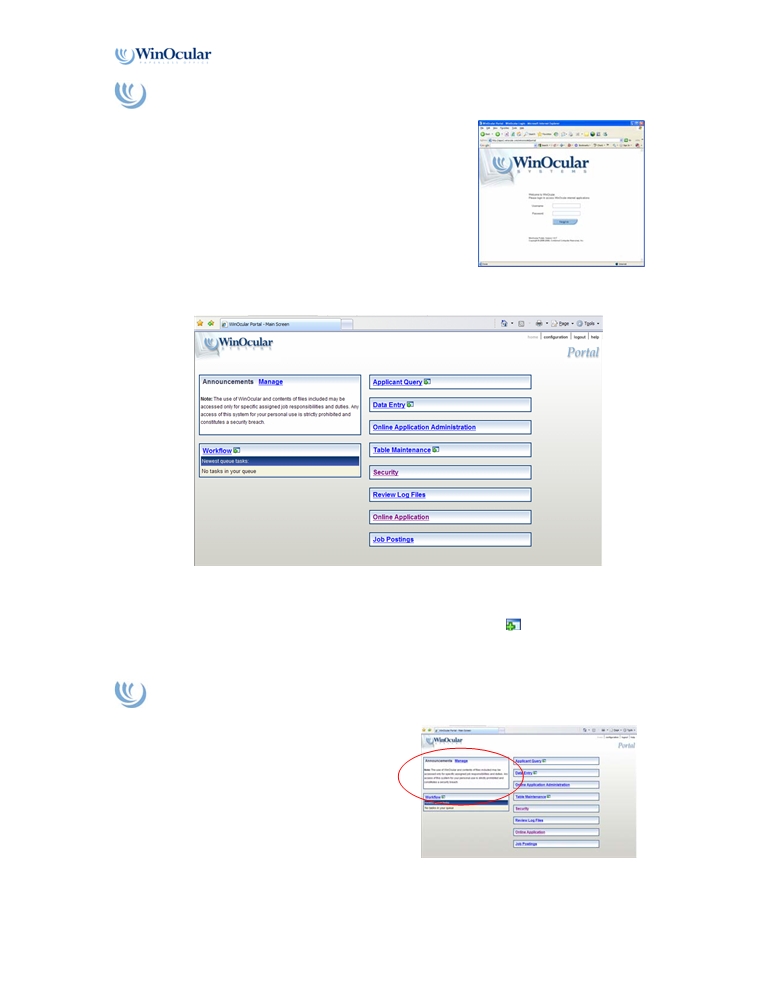
2. Once you successfully login, you should see a page similar to the screen below:
The portal menu should now display the various WinOcular modules that your security
level allows. The different modules can be accessed by simply clicking on the link or if
you would like to open the module
in a NEW window, click the
icon next to the link.
Portal Management
The portal announcements have the ability to
display messages to portal users. The
announcement window is located on the upper
right corner section of the Portal menu screen.
The management of the announcements are can
be accessed using the manage link located
within the announcement window.
Combined Computer Resources, Inc.
Page 2
Portal
To manage announcement:
1. Click the manage link
located in the
ment window.
announce
2. The manage screen
should now be
displayed.
3. You may now edit
existing messages by
clicking on the
pencil icon
located next to the existing
messages.
Text window to add/edit text
for messages.
Date parameters to control display
of messages using a start date and
end date
You may also
control who can
see the message
using the pull
down menu.
4. You may also
use the
formatting tools
cated above
lo
the content
window to
manipulate font, size, color e
tc.
5. You may also use the hyperlink icon
to add hyper links to documents or web
sites using the hyperlink tool located above the content window.
Combined Computer Resources, Inc.
Page 3
Portal
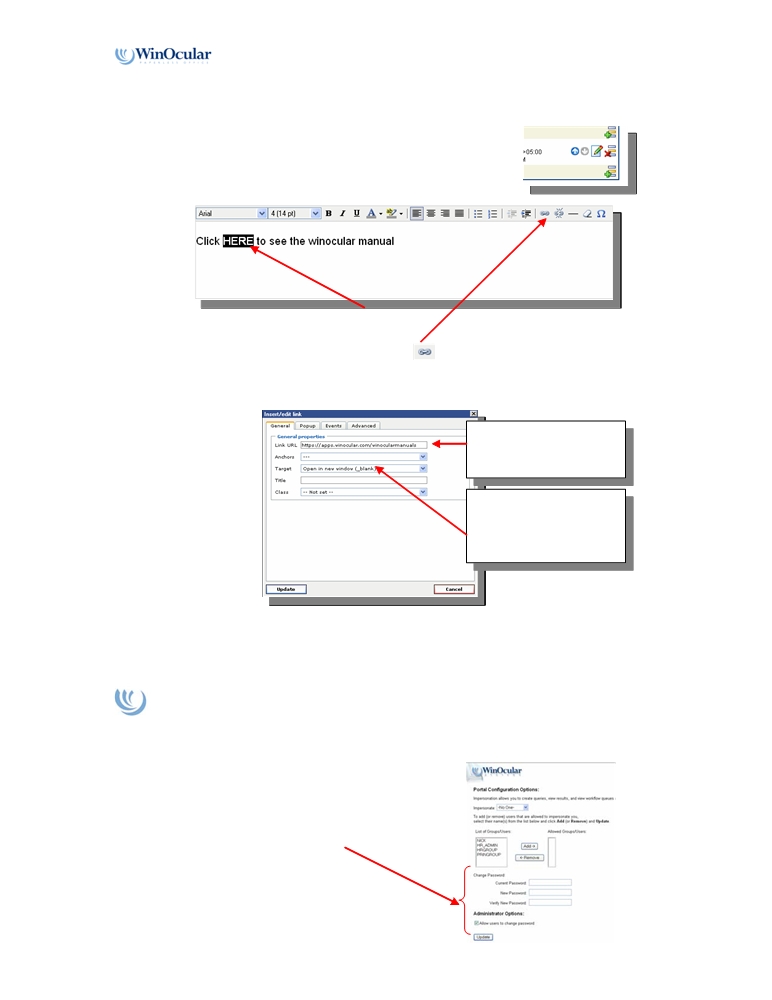
• To add a hyperlink to a document using a word within a sentence as a
anchor:
1. Click
the green plus icon to start a new
announcement.
2. Enter th
e text into the content window
like
the example below.
3. Highlight the word or words you would like to use as the anchor
for you hyperlink.
4.
Click the hyperlink icon
located on the tool bar.
5. The editing window for the hyperlink will now be displayed in a
smaller window like below:
Enter the html address for
the document or page you
would like to link here.
Control if you want the
page for t
he hyperlink to
open in t
he same window
or a new separate window
6. Click the ‘Update’ button to save the hyperlink configuration.
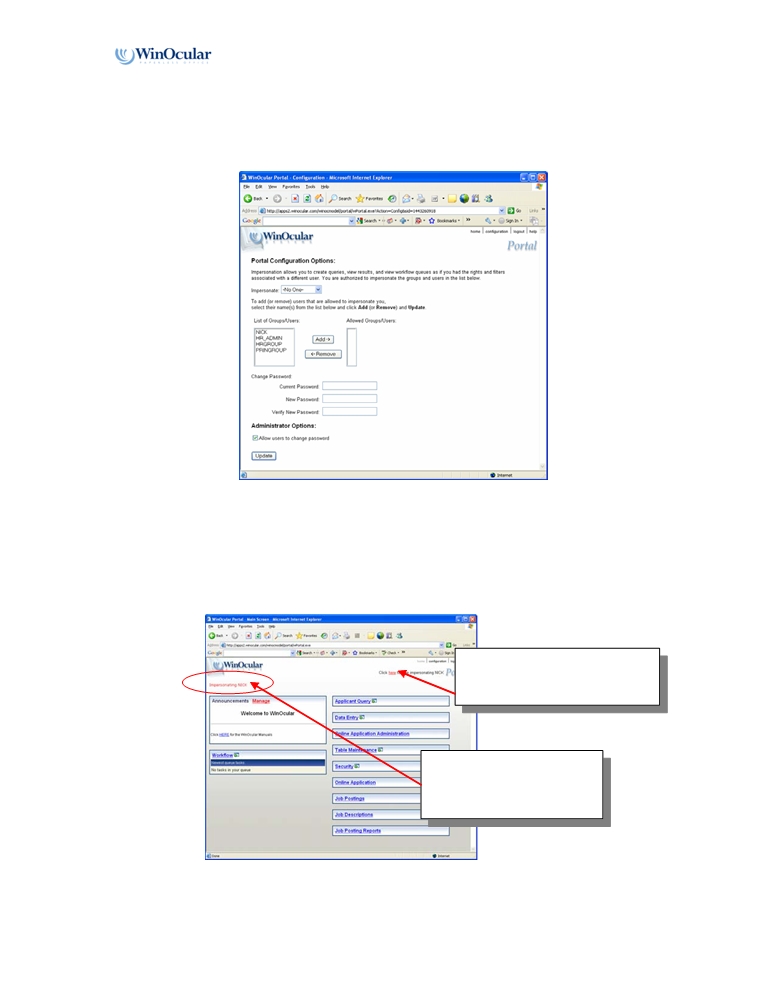
Portal Configuration
T
he con
figuration link
located in the upper right corner of the portal menu screen will
allow f
or additional fea
tures.
•
Allowing users t
o change their password.
•
Make sure the
‘Allow user to change password’
is checked.
Combined Computer Resources, Inc.
Page 4
Portal
• Im
personation ( This feature will need to be authorized using the security
module, this impersonation feature is disabled as a default)
1. If en
abled in security, you should see the followi
ng
screen when you c
lick
the configuration link from the portal menu screen.
2.
You can now select an individual user or a group to impersonate. T
his
impersonation works for all of the au
to login enabled modules like
the
table maintenance, data entry, applicant query, security and workflow.
3. Click the update button once you have selected the user or group to
impersonate.
You may stop impersonating at any
time by clicking the link located
near the upper right corner.
During
impersonation, this
messag
e will appear on the
portal
menu indicating who you
are im
personating.
Combined Computer Resources, Inc.
Page 5